
Part 2: Deploy to GitHub
Configure GitHub
In the upper-right corner of any page, click +, and then click New repository.
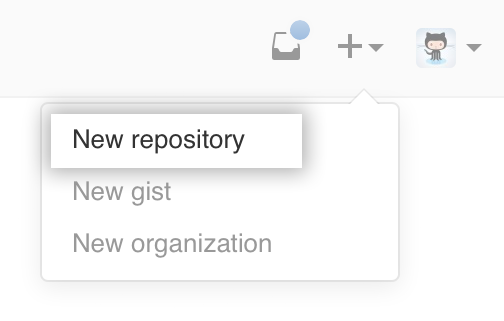
Enter name for your blog project, which must be following this pattern: <username>.github.io

Click Create repository.

Congratulations! You’ve successfully created your blog repository!
Generate SSH keys
Open terminal
Open Git Bash if you are using Windows, or open simply Terminal if you are using Linux or Mac.set your username and email
1
2
git config --global user.name "YourName"
git config --global user.email "YourEmail@Address"Generate SSH key
1
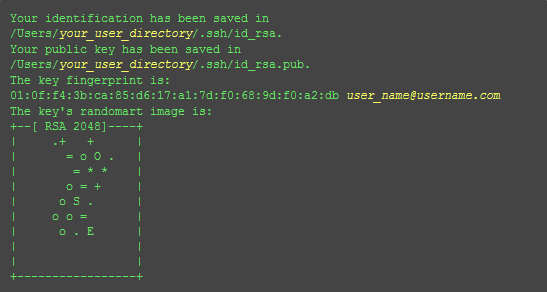
ssh-keygen -t rsa -C "YourEmail@Address"
Then it will show some lines on the screen1
2Generating public/private rsa key pair.
Enter file in which to save the key (/Users/your_user_directory/.ssh/id_rsa):
Simply continue. After this, the system will ask for a passphrase. You may leave it blank if you like.1
2Enter passphrase (empty for no passphrase):
Enter same passphrase again:
- Add your public key on GitHub
Now you should have a hidden directory in your home directory named “.ssh”, whichin this hidden directory, two files should be generated with some string similar to “id_rsa” and “id_rsa.pub”. The second one is what we need to copy to GitHub.
So log in to your account on GitHub, click on the gear-shaped button on the upper-right corner, which will bring you to the setting page. Now find “SSH Keys” on the left hand-side menu, and click on “Add SSH Key”.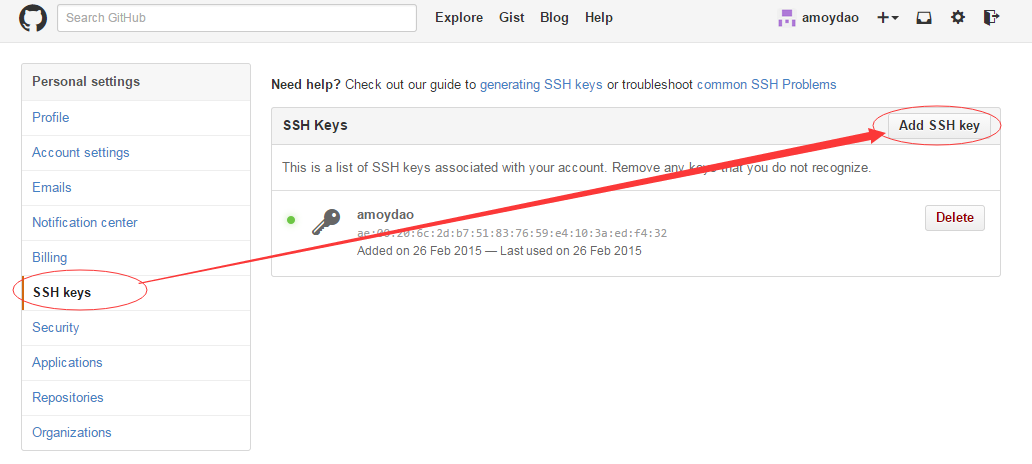
Now open the the “id_rsa.pub” file we mentioned before with any text editor you like, copy all the content within, and paste it in the textbox on the webpage. Confirm the change.
- Test
Enter the following commands in Terminal:1
$ ssh -T git@github.com
When you will see something as below, input “yes”, and enter.1
2
3The authenticity of host ‘github.com (207.97.227.239)’ can’t be established.
RSA key fingerprint is 16:27:ac:a5:76:28:2d:36:63:1b:56:4d:eb:df:a6:48.
Are you sure you want to continue connecting (yes/no)?
Settings on Hexo
You may find your blog settings in file “_config.yml”. There are only two places you need to change at this stage:
Title of your blog
In the very beginning of this file, you can change the title and subtitle to whatever you like.1
2
3
4
5
6
7# Site
title: Brainstorm
subtitle: Geeks never think alike.
description: Yizhe's blog
author: Yizhe Wang
language: en
timezone:Deployment settings
In the very ending of this file, you need to change the repository_url to the repository you created on GitHub. In my example, it should be “git@github.com:wangyiz4262/wangyiz4262.github.io.git”. And branch should be master.1
2
3
4
5deploy:
type: git
message: [message]
repo:
github: <repository url>,[branch]
If you have a domain name of your own, you can bind it to your blog. Please find tutorials online.
Now the deployment is done. Enjoy blogging!